Upgrading your bike’s braking system to hydraulic can be a great way to improve your stopping power and control while riding.
However, fitting hydraulic bike brakes can be a bit of a daunting task for those who have never done it before.
In this article, we will provide you with step-by-step instructions on how to fit hydraulic bike brakes, from gathering the necessary tools and materials to testing your new braking system.
Gather Tools and Materials
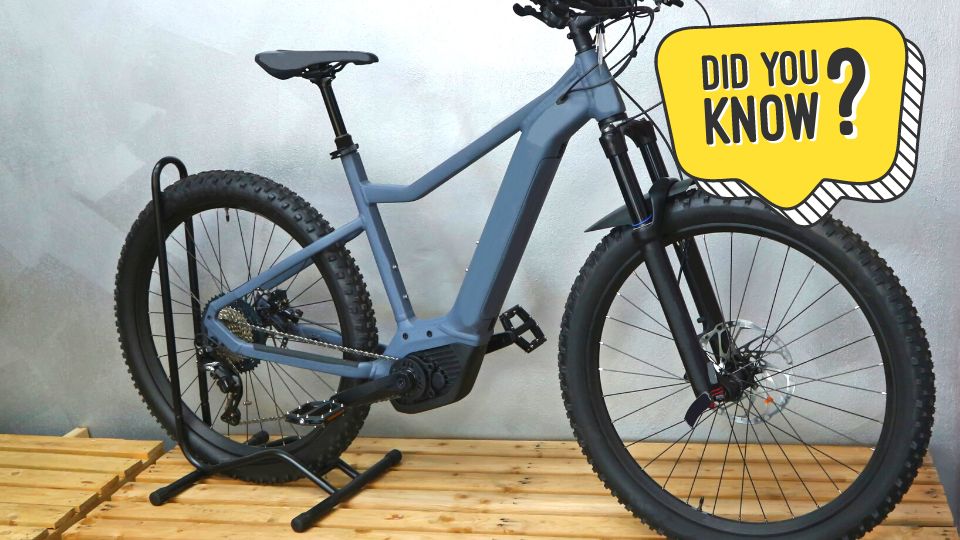
Electric bike hydraulic brakes are a type of brake system that uses fluid pressure to stop the bike. They are more powerful and responsive than mechanical brakes, which use cables and levers. Hydraulic brakes also require less maintenance and adjustment than mechanical brakes. However, they are more expensive and complex to install and repair.
When fitting hydraulic bike brakes, it is important to gather all the necessary tools and materials to ensure a smooth installation process. Here is a list of the necessary items:
- Hydraulic brake kit – This includes the brake caliper, brake lever, hydraulic hose, and brake pads.
- Allen wrenches – You will need these to loosen and tighten bolts on your bike.
- Torque wrench – This will help you tighten bolts to the correct torque settings.
- Brake fluid – You will need to add brake fluid to the hydraulic brake system.
- Bleed kit – This is necessary for bleeding the brakes, which is important to ensure proper brake performance.
- Cable cutters – You will need these to cut the hydraulic hose to the correct length.
- Small container – This is to catch any excess brake fluid that may spill during the installation process.
Optional tools that can make the job easier include a bike stand, a work mat, and a brake piston press tool.
Remove Old Brake System
To fit hydraulic bike brakes, you’ll first need to remove the old brake system. Here are the steps you should follow:
- Gather the necessary tools and materials: You’ll need a set of Allen keys, a torque wrench, a cable cutter, and new hydraulic brake components.
- Remove the old brake calipers: Use the Allen keys to remove the bolts holding the brake caliper to the bike frame. Take note of the position of the caliper, as you’ll need to install the new one in the same position.
- Remove the old brake lines: Use the cable cutter to cut the old brake line as close to the brake caliper as possible. Remove any cable guides or cable ties that hold the brake line in place.
- Remove the old brake levers: Use the Allen keys to remove the bolts holding the brake levers to the handlebars. Take note of the position of the brake lever clamps, as you’ll need to install the new levers in the same position.
- Remove any remaining components: Check for any other brake components, such as cable guides or cable ties, and remove them.
Make sure to discard the old brake components safely and responsibly. With the old system removed, you’re now ready to install the new hydraulic brake components.
Install New Brake System
Once you have removed the old brake system, it’s time to install the new hydraulic brake system. Here are the steps to follow:
- Attach the brake calipers: The brake calipers need to be bolted onto the frame or fork. Use the bolts and washers provided in the brake kit and tighten them to the recommended torque settings.
- Thread the hydraulic brake lines: Thread the hydraulic brake lines through the cable guides on the frame or fork. Make sure the lines are routed correctly and do not interfere with any other components.
- Mount the brake levers: Attach the brake levers to the handlebars using the mounting hardware provided. Adjust the position of the brake levers according to your preference.
- Connect the brake lines to the calipers: Connect the brake lines to the calipers using the fittings provided. Use a torque wrench to tighten the fittings to the recommended torque settings.
- Check for leaks: Before bleeding the brakes, check for any leaks in the system. If you find any leaks, fix them before proceeding to the next step.
Bleed the Brakes
Bleeding the hydraulic brakes is an essential step when fitting new hydraulic brake systems on your electric bike. Bleeding ensures that any air bubbles that may have entered the brake system during installation are removed, allowing the hydraulic fluid to flow properly through the system.
Here are the steps to bleed hydraulic bike brakes:
- First, make sure your bike is secured in a bike stand or upside down, so the brake caliper is in an upright position.
- Locate the bleed port on the brake caliper. This is typically found on the side of the caliper, near the brake hose.
- Attach the brake bleed kit to the bleed port. The kit typically includes a syringe, tubing, and a bleed block.
- Fill the syringe with hydraulic brake fluid and attach it to the bleed port on the brake caliper.
- Open the bleed port and slowly push the hydraulic fluid through the system. You should see any air bubbles rise to the top of the syringe. Continue this process until no more air bubbles are present.
- Tighten the bleed port and remove the syringe from the bleed port.
- Check the brake fluid level and add more fluid as necessary.
- Repeat the same process on the brake lever bleed port to ensure that the entire system is free of air bubbles.
By bleeding the hydraulic brakes properly, you can ensure that your brakes will work effectively and safely when you ride your electric bike. It is recommended to bleed the brakes at least once a year or whenever you notice a decrease in braking performance.
Adjust the Brakes
Adjusting the brakes on your new hydraulic brake system is crucial to ensure optimal performance and safety while riding your electric bike. Here is a step-by-step guide to help you adjust your hydraulic brakes.
Adjust brake pad alignment
Begin by ensuring that the brake pads are properly aligned with the rotor. You can do this by checking that the brake pads are centered over the rotor and have equal spacing on each side. Adjust the position of the brake pads as necessary.
Adjust brake pad clearance
Ensure that the brake pads are not touching the rotor when the brake lever is released. You can check this by spinning the wheel and observing the brake pads. If the brake pads are too close to the rotor, loosen the brake caliper mounting bolts and adjust the caliper position until the pads are properly aligned.
Adjust brake lever reach
The brake lever should be positioned so that it is comfortable for you to reach and operate. Adjust the reach of the brake lever by loosening the mounting bolt and sliding the lever along the handlebar to the desired position.
Test the brakes
After making adjustments to the brake system, it is important to test the brakes to ensure that they are working properly. Squeeze the brake lever and check that the brake pads engage the rotor smoothly and with sufficient force to bring the bike to a stop.
Fine-tune adjustments
If necessary, fine-tune the adjustments by making minor tweaks to the brake pad alignment, clearance, or lever reach until the brakes are working optimally.
Test the Brakes
Once you have installed and adjusted the new hydraulic brake system on your bike, it’s important to test it to ensure it’s working properly. Here are some steps to follow to test the brakes:
- Check for leaks: Before testing the brakes, check the brake lines and connections for any signs of leaks or damage. If you notice any leaks, fix them before proceeding.
- Bed in the brake pads: Bedding in the brake pads involves riding the bike and gradually increasing the force and frequency of the braking. This helps the brake pads and rotor to wear in together, resulting in better braking performance.
- Test on flat ground: Find a safe and flat area to test the brakes. Start by riding at a slow speed and apply the brakes gently to see how the bike responds.
- Test at higher speeds: Once you have tested the brakes at low speeds, gradually increase your speed and apply the brakes more firmly. This will help you to determine if the brakes are responsive and have sufficient stopping power.
- Test emergency braking: In a safe environment, perform an emergency stop to test the braking power of the system. This will help you to know if the brakes are reliable in case of an emergency.
- Make adjustments if necessary: If you notice any issues with the braking performance, make the necessary adjustments. This may involve adjusting the brake pads, the caliper position, or bleeding the brake system again.
You might wonder what kind of brakes are better: hydraulic or mechanical. Hydraulic brakes use fluid to transfer the braking force from the lever to the caliper, while mechanical brakes use a cable. Hydraulic brakes are more powerful, responsive and require less maintenance than mechanical brakes, but they are also more expensive and harder to fix if something goes wrong.
Mechanical brakes are cheaper, simpler and easier to adjust, but they need more frequent tuning and cleaning. The best choice depends on your budget, riding style and personal preference.
Conclusion
By following the steps outlined in this article, you should be able to confidently fit hydraulic bike brakes on your own. It’s important to take your time, be patient, and follow the manufacturer’s instructions carefully to ensure that you install the new brake system correctly.
With the right tools and a little bit of know-how, you can enjoy a smoother and more powerful ride with your newly upgraded hydraulic brakes.